
All rights reserved.
Pos Optima Responsive Prestashop Theme 1.7.x.x, 8.x Theme
Pos Optima is a premium Responsive Prestashop theme with advanced admin modules, extremely customizable and fully responsive. It is suitable for every type of store. It is a standalone design package so you can easily create your own sub-themes.
PosThemes
Installation
- To install the theme you must have a working version of Prestashop already installed. For information in regard to installing the Prestashop platform, please see the Prestashop Documentation.
- Once the installation is done, delete the /install folder and write down the new of the /adminfolder, which has been generated in order to be unique to you, for security reasons.
Requirements
Before you get started, make sure you have all the requirements available: Server space at a Hosting Provider, Domain Name, FTP client, Text Editor.
- System: Unix, Linux or Windows. Unix is highly recommended.
- Web server: Apache Web Server 2.2 or any later version.
- PHP: We recommend PHP 7.1 or later.
- MySQL: 5.6 minimum, a recent version is recommended.
- Server RAM : The more the merrier. We recommend setting the memory allocation per script (memory_limit) to a minimum of 256M.
Must-have PHP extensions:
- CURL. The Client URL extension is used to download remote resources like modules and localization packages.
- DOM. The DOM extension is needed to parse XML documents. PrestaShop uses it for various functionalities, like the Store Locator. It is also used by some modules, as well as the pear_xml_parse library.
- Fileinfo. The File information extension is used to find out the file type of uploaded files.
- GD. The GD extension is used to create thumbnails for the images that you upload.
- Iconv. The ICONV extension is used to convert character sets.
- Intl. The Internationalization extension is used to display localized data, such as amounts in different currencies.
- JSON. The JSON extension is used to manage JSON format.
- Mbstring. The Multibyte string extension to perform string operations everywhere.
- OpenSSL. The OpenSSL extension is used to improve security.
- PDO. The PHP Data Objects extension is used to connect to databases.
- PDO (MySQL). The PDO_MYSQL driver is used to connect to MySQL databases.
- SimpleXML. The SimpleXML extension is used to manage XML files.
- Zip. The Zip extension is used to expand compressed files such as modules and localization packages.
Permissions:
- Permissions for all files should be set to "644"
- Permissions for all folders should be set to "755"
How to verify your server meets PrestaShop’s requirements:
You can use our system requirements tool to easily check if your environment fulfills PrestaShop’s requirements. Here’s how:
- Download the latest version from GitHub.
- Extract the zip file.
- Upload the
phppsinfo.phpfile to your server and put it inside your current shop’s directory or the one where you intend to install it. - Open it up on your browser (
http://your-domain.com/path-to-your-prestashop/phppsinfo.php). - Type in the login and password if prompted (use
prestashopfor both).
Install Theme
- You must install default prestashop before. You can see instruction install default prestashop on Prestashop Wiki: http://doc.prestashop.com/display/PS17/Installing+PrestaShop
- Once the installation is done, delete the /install folder and write down the new of the /admin folder, which has been generated in order to be unique to you, for security reasons.
Installation Tutorial Video: How to Install Optima Prestashop theme (Creative Elements)
Follow the steps below to setup your site template:
Log into your Prestashop Back-Office and go to Design > Theme & Logo
Then click on the Add new theme button. Next browse for the zipped theme file.

***Make sure you take the "Installable zip" as this is what you would upload. "Installable zip" file is called "pos_optima_theme_x.x.x.zip"
Once Prestashop has unpacked and installed the theme, just click to Use this theme button

- TO INSTALL OTHER DEMO, PLEASE FOLLOW STEPS BELOW:
Go to POSTHEMES > Modules > Theme settings

Choose Demo Setup : Choose demo (which has not been imported yet) you want to import then click Import button. Example, here: import Cosmetic 1 demo. If the demo has already been imported, skip this step.

Click Header : At Header template : Choose header template from imported templates which you want to show.(Example: If you want header like header of Cosmetic 1: Select Cosmetic 1 - Header )

Click Homepage : At Homepage template : Choose homepage template from imported templates which you want to show.(Example: If you want homepage like homepage of Cosmetic 1: Select Cosmetic 1 - Home )

Click Footer : At Footer template : Choose footer template from imported templates which you want to show. (Example: If you want footer like footer of Cosmetic 1: Select Cosmetic 1 - Footer )

Click Save button save your config.
- Finish installer.
Images Settings
Create or edit size image and Regenerate thumbnails
-
Go to Design > Images Settings

-
Create or edit size image

-
Choose Regenerate thumbnails button


-
After that, we got:

PrestaShop’s Features
User will also be able to efficiently manage your PrestaShop site without related the programming skill. You work in the front-office interface directly (in the Administration Area), which can be helpful to everyone, special for shop owners. To find more informations, please read on http://doc.prestashop.com/display/PS17/User+Guide
Note: When you finish install theme, you should disable cache. This step will help your Prestashop site active normally.
- Advanced Parameters > Performance
- At field Cache, choose No

- Click Save button
Creative Elements
- Please read more at Creative Elements & Pos Elements
How to edit Header, Footer, Homepage content with Creative Elements
- Tutorial video: How to edit content page with Creative Elements page builder
The first way:
 and then click it. The Creative Elements panel will be shown.

The second way:


Multilanguage Layouts Configuration
Tutorial Video: Multilanguage Layouts Configuration(Creative Elements)
*** Multilanguage Homepage Configuration




*** Multilanguage Header Configuration


*** Multilanguage Footer Configuration


Static Blocks in Optima theme
Enabling Static Block with other language
In your theme, if there are 3 languages or more, please enabling static block by below guide:
- Login your prestashop admin
- Go to International > Localization .

- Choose tab Languages.

- Go to POSTHEMES > Modules > Pos Staticblocks

- Click "Edit" button of your selected block
- Choose Source Code
 to show code HTML of this block in English. Then copy source code.
- Click
 to choose language you want to translate. Choose Source Code

- Click Save button when you finish
*** Static blocks in Optima theme:
Map Block : In Contact Us page

payment block : In detail page

*** How to edit these static blocks:
- Login your prestashop admin
Go to POSTHEMES > Modules > Pos Staticblocks

At the static block you want to edit > Click Edit

Then, you can edit the static block as you want
Click Save button to save your changes
Product Types & Product Categories
How to set a product as new product
- Login your prestashop admin
- Navigate to CONFIGURE > Shop Parameters > Product Settings

- In "Products (general)", enter "Number of days for which the product is considered 'new'"
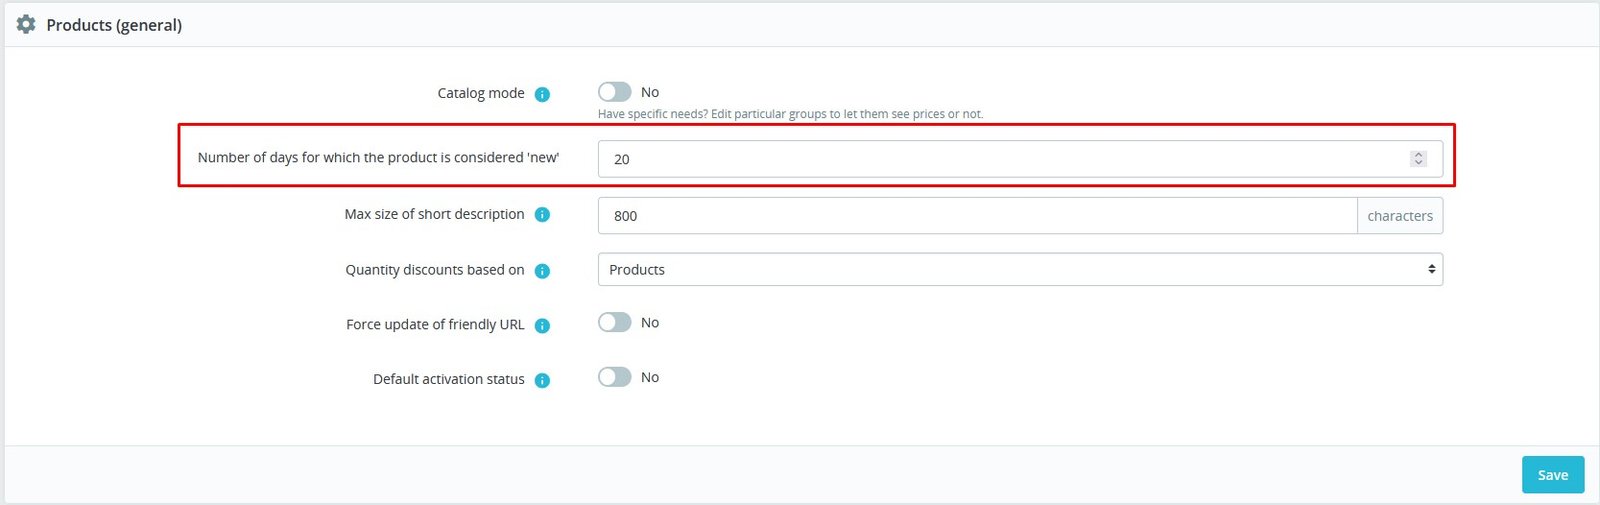
- Click "Save" button.
How to set time for discount product
- You set product as discount product. Please see in How to set a product as discount product
- From the Specific Prices tab, when you Add a new specific price, you choose discount prior and set discount:
- from: Select a beginning date for this discount.
- to: Select an expiration date for this discount. 
- Click "Save" button
How to display related products on product detail page
- Login your prestashop admin
-
Go to Catalog > Products

-
Choose item you want to edit, click


- At tab Basic settings, then click Add a related product button
-
Then search and add a related product
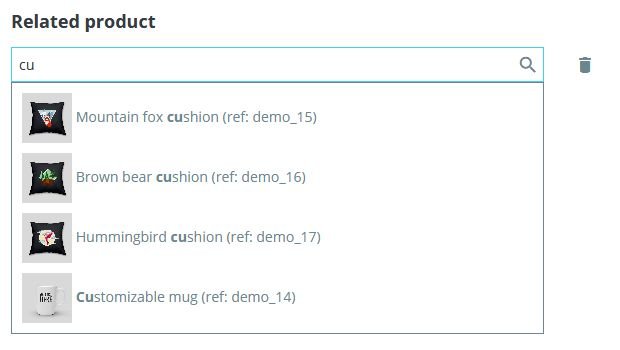
- Click “Save” button when you finish.
How to upload thumbnail image for the product category
- Login your Prestashop admin
-
Go to Catalog > Categories
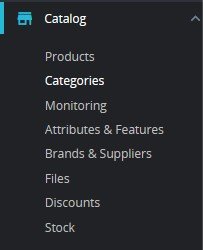
-
At Actions of the category you want to show thumbnail : Choose Edit to edit

-
At Category thumbnail : Click Choose file(s) to upload new thumbnail image.

-
Click Save button to save your change.
Module Config
General Configuration
- Login your Prestashop admin
-
Go to Modules > Modules Manager

-
Choose “Modules” tab

-
On selected module, click "Configure" button.

You will get a form with parameters of the module. Let's change the specified parameter with one suitable for your theme.
- Click “Update” button to save config.
Module Configuration
Below is a list of all modules in Optima theme. Click on the name of module you want to read configuration guide.
- Megamenu custommer
- Vertical Megamenu
- Creative Elements - Elementor based PageBuilder [in-stock]
- Pos Elements
- Pos Static Blocks
- Pos Themeoptions
- Pos search products by category
- Pos Shopping cart
- Quick menu mobile
- Pos size chart
- Pos Fake Orders
- Pos Compare
- Pos Wishlist
- Pos Product Extra Tab
- Pos Product Comments
- Pos Cookie Law
- Pos Newsletter Popup
- Rotator img
*** You can go to Admin > Dashboard > POSTHEMES > Modules to config modules below:

- Theme settings : Pos Themeoptions
- Cookie law : Pos Cookie Law
- Fake orders : Pos Fake Orders
- Popup : Pos Newsletter Popup
- Product Extra Tab : Pos Product Extra Tab
- Mega menu : Megamenu custommer
- Vertical menu: Vertical Megamenu
- Pos Staticblocks : Pos Static Blocks
- Mobile quick links : Quick menu mobile
- Size chart : Pos size chart
Other modules
Included external modules (3rd party developers) and Prestashop module
- Smart Blog
- About Smart Blog module
- Login your prestashop admin
- Go to POSTHEMES > Blog

- Posts : Add, Delete or Edit Posts of Blog
- Category : Add, Delete or Edit Categories of Blog
- Comments : Manage Comments
- Image Type : Manage type of images
- Settings : Settings of Smart blog
- Add Blog Post
- Login your prestashop admin
- Go to POSTHEMES > Blog > Posts


- Click “Save” button when you finish.
- Edit Blog Post
- Login your prestashop admin
- Go to POSTHEMES > Blog > Posts
- Choose item you want to edit, click Edit
- Then edit
- Click “Save” button when you finish.
- About Smart Blog module
- Newsletter subscription

- Faceted search
Displays a block allowing multiple filters.

- Products in the same category
Products in the same category show products on the same category.

- Social media follow links
Social media follow links allows you to add information about your brand's social networking accounts

- Social media share buttons

Social media share buttons displays social media sharing buttons (Twitter, Facebook, Google+ and Pinterest) on every product page

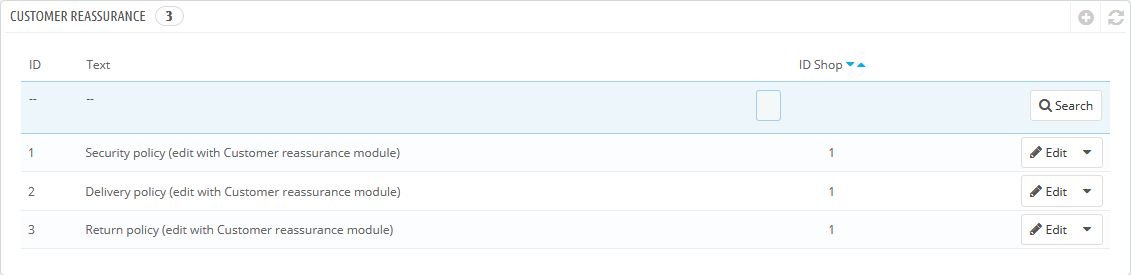
- Customer reassurance
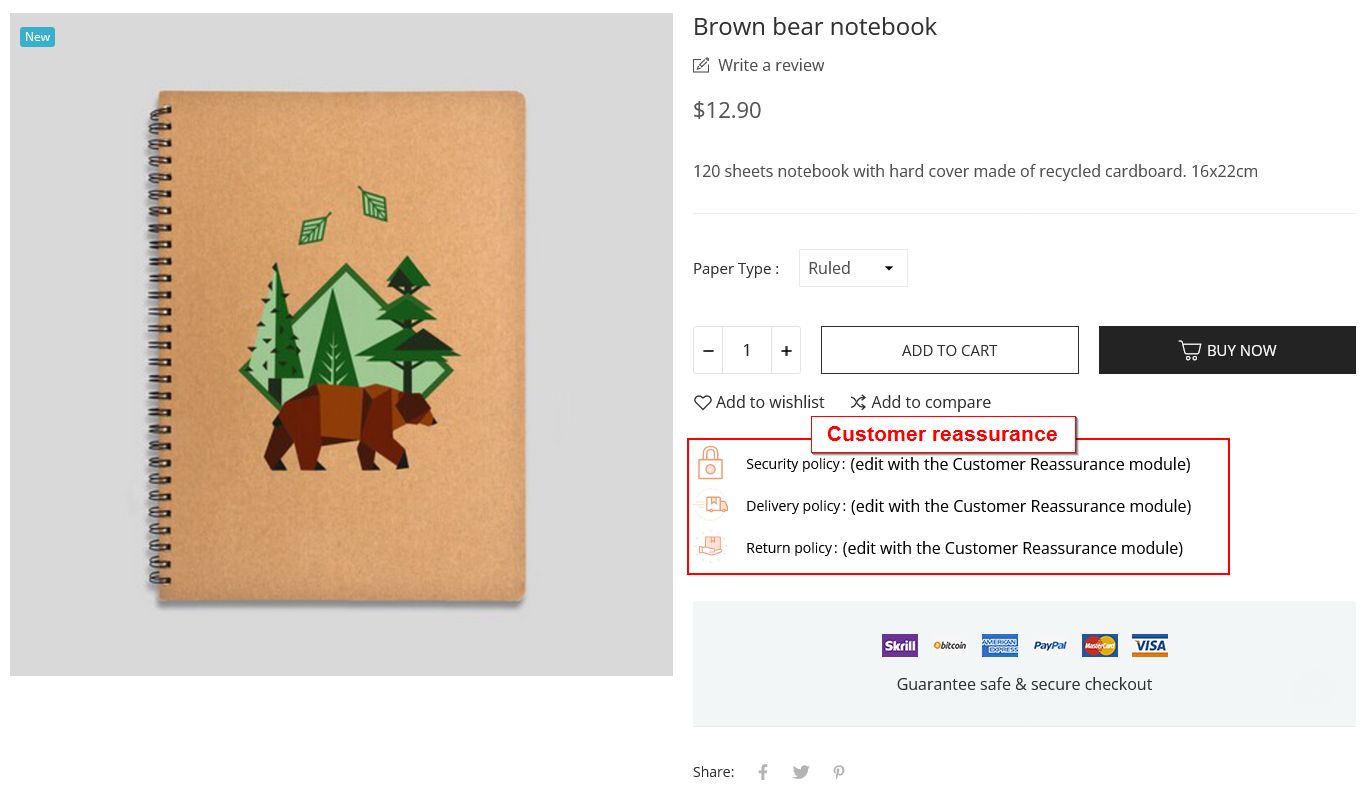
Customer reassurance module offering helpful information to reassure customers that your store is trustworthy.
- Category tree links
Category tree links displays a block featuring product categories

Translate Optima theme
Back office translations
- Login your prestashop admin
- Go to International > Translations

- At "Modify translations" section:
- Type of translation : Back office translations
- Select your language : Choose language you want to translate
- Choose Modify
- Then search text need translate

- After typing your language, click Save to finish.
- Note: To find more informations, please read on http://doc.prestashop.com/display/PS17/Translations
Themes Translations
- Login your prestashop admin
- Go to International > Translations

- At "Modify translations" section:
- Type of translation : Themes translations
- Select your theme : Select theme you want to translate
- Select your language : Choose language you want to translate
- Choose Modify
- Then Search titles or text need translate
- After typing your language, click Save and stay or Save to finish.
- Note: To find more informations, please read on http://doc.prestashop.com/display/PS17/Translations
Translate module content
1. Pos Staticblocks
- Login your prestashop admin
- Go to POSTHEMES > Modules > Pos Staticblocks
-
- Click "Edit" button of your selected block.

- Choose Source Code to show code HTML of this block in English. Then copy source code.
- Click to choose language you want to translate
- Choose Source Code and paste code HTML. Then translate
- Click Save button when you finish
2. Megamenu custommer
- Login your prestashop admin
- Go to POSTHEMES > Modules > Mega menu

- Click "Edit" button of your selected menu item.

- Click to choose language you want to translate.

- At Title, Sub Title: Translate text into your language.
- Click Save button when you finish
3. Vertical Megamenu
- Login your prestashop admin
- Go to POSTHEMES > Modules > Vertical menu

- Click "Edit" button of your selected menu item.
-
- Click to choose language you want to translate.
-
- At Title, Sub Title: Translate text into your language.
- Click Save button when you finish
Posthemes Support
Support Working time: Monday - Friday
Estimated ticket and answers review time: 1-3 business days.
We have hundreds of questions and provide answers asap, but this can take up to 3 days after your submitted request. Please be patient and wait for answer.
Send us email to posthemes@gmail.com.